Showing posts with label DIY. Show all posts

Friday, January 31, 2014

Fashionable Friday: Why You Should Wash Your Face With Olive Oil

It's Bath and Beauty Friday! Here's your background info:


  • I used to have the oiliest skin of all time (foreshadowing: used to)
  • I'm a bit of a dirty hippie

When I was a senior in college, Eva, my Best Friend In the World (my mostly companion of 26 years, the friend I have had since before I was born) experimented with a chemical-free beauty regimen. This included baking soda instead of toothpaste, corn starch instead of deodorant/antiperspirant, baking soda instead of shampoo, and olive oil instead of face wash.

I was so. jealous.

I'm fully integrated into the 21st century - I have an iPhone and a Kindle and a car with Bluetooth and I get checks direct deposited (when I remember to turn in my voided checks) but sometimes I'm afraid of all the Chemicals in my life. There are Chemicals in, like, EVERYTHING - not only will our phones give us brain cancer, they will eventually break down and seep chemicals directly into our soil and water and give us stomach cancer. And there are tons of Chemicals in the other things we use every day - cleaning solutions, foods, and beauty products. Do we really NEED all those extra preservatives and detergents hanging around our bodies like that?

This flower child wanted to see how much she could simplify her beauty routine. I tried to use baking soda as toothpaste (it tasted disgusting, but felt okay; mostly, it was a little complicated to do, so I stuck with regular toothpaste), corn starch instead of deodorant (left my pits BONE DRY, but didn't do a THING to combat stench - I have literally never smelled worse in my life), baking soda instead of shampoo (my curls laugh at this method, and refuse, as usual, to be tamed), and olive oil as face wash.

My face LOVES to be cleaned with olive oil. 

It sounds counter-intuitive, I know - why would oil help oily skin? But when you look at the *science*, it all comes together. The best, most succinct explanation I've read comes from Crunchy Betty:
"You know how your skin – all of it – secretes oil? Even if your face feels dry, it still has oil on it. Well, according to chemistry know-how, like dissolves like. So, effectively what you’re doing is dissolving and wiping away all the icky dirty oil from your face and replenishing it with clean, nourishing oil. There’s no harsh chemicals involved. No suds. Nothing to actually strip your skin of its oil. And this is good, because when you strip your skin of its sebum, it goes into overdrive, trying to create more. Which leads to clogged pores. Blackheads. Whiteheads. Just plain old irritation."
Don't you want to slather your face in oil?! I hope so, because I think if you try it you will fall. in. love.

There are a lot of different ways to cleanse with oil - a Google search will return a ton of options. Here's my method:

  • I have a soap dispenser filled with equal parts olive* and grapeseed oil.
  • I turn on my hot water and let it get really warm.
  • While I wait, I pump a dime-sized amount into my hand and massage it all over my face (This is how I remove my makeup, by the way. Oil will lift the waterproof mascara straight from your lashes. Oh, and it's ridiculously gentle - if you poured the oil straight into your eye, it wouldn't hurt at all).
  • I soak a washcloth in the hot water, lightly wring it out, and then lay it over my face for a minute. The steam opens my pores for maximum cleanliness.
  • I wipe the oil off with the washcloth, rinse it out, and hang it to dry.

That's it! I do this at night, and in the morning I splash my face with cold water. If it's particularly dry outside, I'll put a few drops of oil on my whole face as a moisturizer. You can use the same stuff you wash with. 

I've been cleaning my face this way for four years, and I love it. My skin has never been softer, and it's not oily any more. Guys, science! 

Oh, and the OCM is insanely inexpensive. So chew on that.

I will say, this method doesn't always travel well. It's ever so slightly annoying to cart around a washcloth, and since it gets completely soaked, it's even more annoying to take home. When I was in Israel, I washed my face with a traditional cleanser (by First Aid - I got it as a deluxe sample from Sephora) and used maracuja oil (a gift from the aforementioned Eva) to moisturize at night and in the morning.

That's another thing - oils are really "in" right now. If you go to Sephora, Ulta, or even CVS, you'll see a lot of oils on the shelves. The maracuja oil is AMAZING stuff (I seriously adore it), but I urge you to save your money with this. Grapeseed, almond, avocado, safflower, olive, and castor oils can ALL work for cleansing and moisturizing, and you can get them for a fraction of the price.

So guys, don't you think it's about time to embrace your inner hippie, give your wallet and your face a break, and treat yo self to some oils?

*According to Crunchy Betty, I might be a freak, since olive oil works for me. You might want to try other oils, since it seems to cause trouble for most people.


Tuesday, September 3, 2013

Make-it-Monday: Painting a Bedroom for the First Time

Does anyone else hate doing new things? I get really overwhelmed when I have to do something totally new. I'm a total perfectionist, and I'm always afraid I'm going to mess-up beyond repair. Last week, I did something really intimidating - I painted my new bedroom

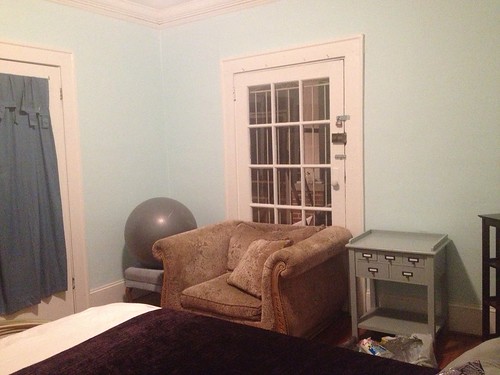
The first time I visited my new apartment, I fell in love with it - err, most of it. The bedroom was painted this awful dark apricot. The room gets little light to begin with, and the color made it feel like a dungeon. I've threatened to paint in the past, but until now I never followed-through. It seemed like such a huge project, something that would cause me stress and heartache, and which I'd probably just mess up. Still, I couldn't bear to live in that dark room, so I decided to take the plunge.

I don't have a natural gift for interior design (my spaces tend to look messy and cluttered and mismatched), but I wanted my new room to feel like an "adult" space. Naturally, I turned to Pinterest. I ran a search for "mint bedroom," and I found a lot of great inspiration. I after a while, I started to notice patterns - gold accents, white lights, soft blues, and pops of brighter color.

But there's more to design than just picking colors - you have to slap it up there. I did setpainting in college, but I figured there would be more to it than just that. I found some great articles (How to Prepare a Wall for PaintingHow to Paint a RoomDIY Painting Tips, Tricks...Painting a Room Step-by-Step) that walked me through wall prep, priming, and color application. After reading all these (and more), I felt prepared. 

And as it turns out, I was! The hardest part, by far, was taping out the room and securing the dropcloths. It was tedious and boring, and took a good hour and a half. But once I had covered all the trim, the rest was a blast. Painting isn't nearly as hard as I thought it would be, once I was armed with Knowledge.

If you're looking to paint, and you're afraid you don't have what it takes, I promise you, you do. If I can pull it off, then so can you. If you still don't feel ready after reading those articles, then consider this novice's final bits of advice:
  • Get supplies well in advance - Painting Days are stressful enough without running around all morning for supplies. Get everything at least 24 hours before you want to start painting.
  • Buy a sample of the color you want - I wasn't sure quite which color to go with, so I bought small samples of my two finalists and painted a small patch of each on a primed wall. The next day, when I went to buy my gallons, I knew exactly which color to go for. Plus, now I have these teeny pots of paint that will be great for touch-ups or crafts.
New Room
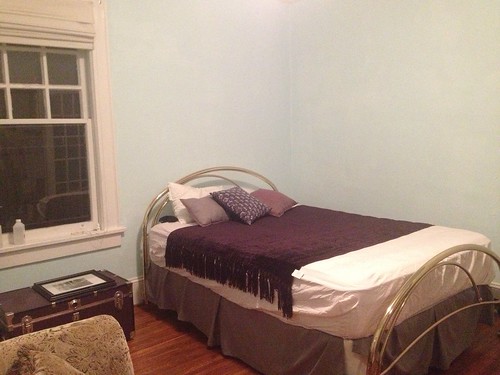
I went for the color on the right - Icy Blue by Valspar (from Lowe's)
  • Don't be afraid of cheap paint - Before you splurge on the expensive stuff, do a little research. I was interested in Valspar, but it since it was the cheapest option at Lowe's, I was a little wary. I jumped online, and read some glowing reviews of the brand. I went ahead and bought two gallons, knowing that it wouldn't slide right off the wall or dry all patchy.
  • Don't do it alone - My new bedroom isn't huge, but it would have taken me a long time to paint it by myself. I enlisted a few helpers for each day, and they made the time fly by.
I'm so happy with how my room looks now. The walls are so bright, and the color is so soothing.

New Room

New Room

If you have any tips of your own, leave them in the comments. I might do another room, and I'd love your input.


Monday, August 26, 2013

Make-it-Monday: Creating a Flower Crown

DIY Flower Crowns

DIY Flower Crowns

Remember the charming, crafty Caleigh? She and some girlfriends have been sporting lovely DIY flower crowns when they go out on the town.

#heartfullofheadbands
She wore this one when she came to see Hair

Naturally, I invited her over so she could teach me her ways.

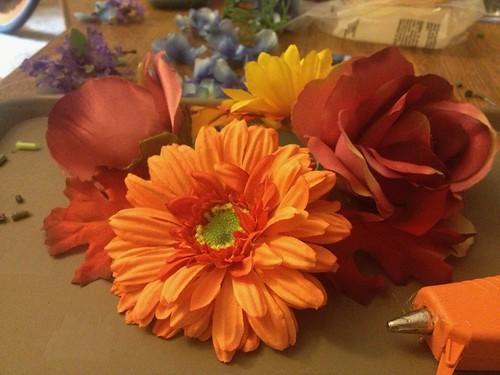
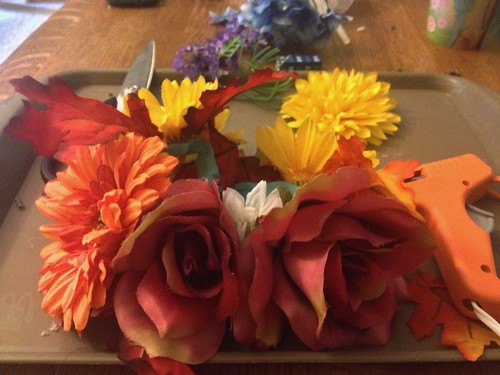
This craft really couldn't be simpler or cheaper. All you need are...
  • A hot-glue gun
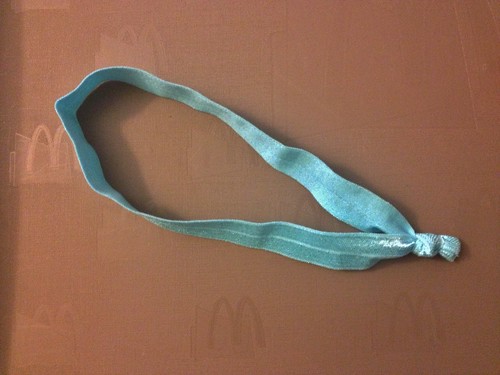
  • An elastic headband (or length of elastic fitted to your head size)
DIY Flower Crowns
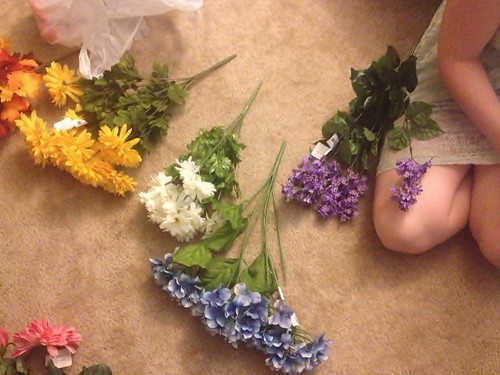
  • Fabric flowers
DIY Flower Crowns

Congratulations - you can make a flower crown! Just arrange the flowers in your desired pattern and glue them to the band. Easy-peasy.

DIY Flower Crowns

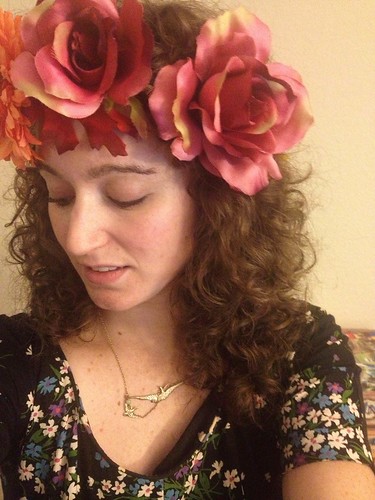
Since Atlanta has practically skipped summer (our fair city thinks it's October already), I decided I'd give my crown an autumnal feel. I picked some orange and red leaves, and based my color scheme around them.

DIY Flower Crowns

DIY Flower Crowns

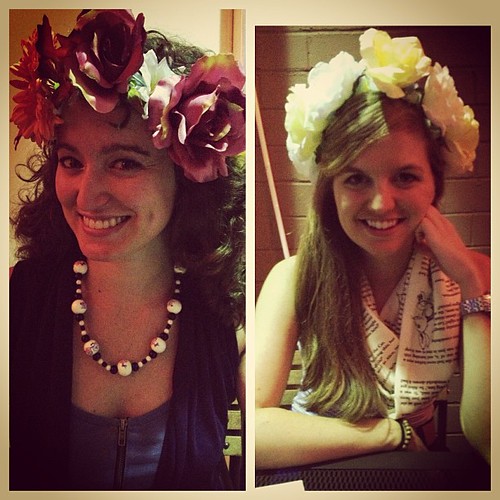
Caleigh made hers a little more uniformly. She alternated large white flowers with smaller blue ones, and likes to wear hers high, well above her hairline.

DIY Flower Crowns

DIY Flower Crowns

Nearly-Former Roomie (we're moving) used smaller flowers for a softer, more romantic feel.

DIY Flower Crowns

DIY Flower Crowns

Flower crowns
Photo credit: Caleigh Allen

If you're looking for a really simple, intensely girly craft to do this week, I recommend the flower crown. You can make one for yourself, and then go crazy creating them for friends. Just make sure you wear them the next time you go to dinner!

Flower crowns
They're a guaranteed conversation starter
Photo credit: Caleigh Allen


Friday, August 2, 2013

Fashionable Friday: I Cut My Own Bangs

Last week, I decided I needed a change, so I cut my own bangs.

Untitled

That's right, I'm a rebel! I cut my own hair! 

Untitled

You've probably noticed that I'm a huge cheapskate. As much as I'd like to pay for fancy haircuts, I have to keep a pretty tight leash on my cash. Instead of dropping $60 every six weeks on haircuts, I paid $9 for a pair of shears three years ago, and I trim when the spirit moves me. 

Untitled

I've been getting a lot of great response to my new 'do - and even better, I love what I see in the mirror. 


Friday, July 12, 2013

Fashionable Friday: Flower Child

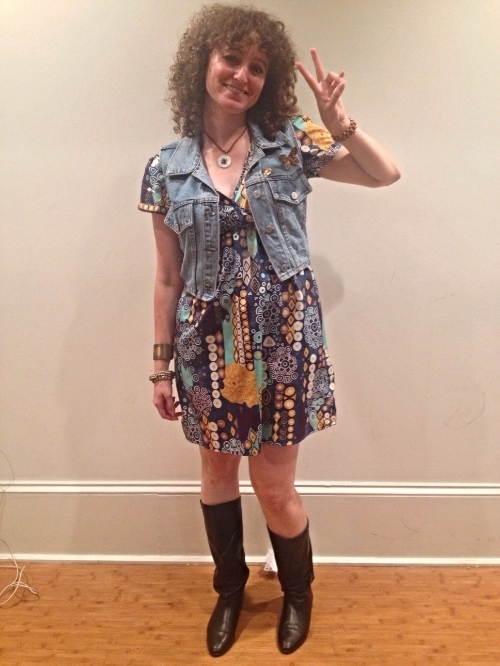
I'm wearing my new jeans in honor of my tribe of flower children. Nothing like reducing a social protest movement to a simple fashion statement, eh?

Flowered jeans 

Flowered jeans

Along those lines, I made the bracelet in the summer of '08 at a store called Yucandu (think Color Me Mine, but not just for pottery). It's decoupaged with pictures of the Kent State Massacre, and Vietnam protesters standing in the Reflecting Pool in Washington. I wear it as a reminder to care, deeply, about the world around me. 

Flowered jeans
shirt: Marshall's /  jeans: Thrifted (Free People) /  sandals: Target /  earrings: Forever 21
bracelet: DIY
Flowered jeans
Attack of the five-foot hippie!

Monday, May 27, 2013

Make-it Monday: The Perfect Wedding Season Dress

I ordered a dress from Anthropologie a few weeks ago, and I finally got it yesterday. It was on MEGA sale ($35!) and the moment I saw it, I wanted it for this year's wedding season. But, as expected, it didn't fit perfectly.


Adorable, right? But too big in the bodice. That's to be expected - the dress doesn't have a structured back. Instead, the silk straps cross each other and reattach at the hips. Today, I set out to get a better fit.


I didn't want to shorten from the bust, because of the ruching. 


The sides would be difficult to work with because the zipper is sewn onto the silk on the left side. 


So I decided to take from the straps themselves - hopefully disguising the seams under the twist.

I laid the dress out and folded an inch of material from under the twist on both straps.


Surprisingly, the thread that matched the best was red. 


I took out exactly enough fabric - it fits like a dream! However, I overshot on one side and sewed too high. The dress fits great, but the seam is visible. 
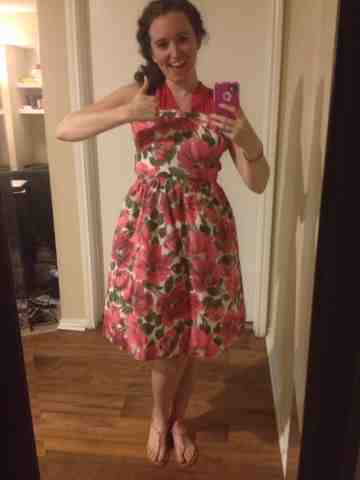

What do you think - should I leave it as-is, or should I try to move the seam down? 

I'm nervous about messing too much with the fabric - it's very delicate, and my machine has been pulling at the thread a bit. The visible seam bugs me, though. Am I obsessing, or does the seam need to be hidden?

I'm really excited to wear this dress. My friends Laura and Jeremy are getting married in July, and this frock will make it's debut at their wedding. Plus, I have two shoe options.

For the ceremony:


For the reception:


Ain't no way I'm dancing in those heels!

Sunday, May 19, 2013

Make-it-Monday: Taking-in a Sweater at the Sides

This week's DIY went so much better than I had expected. Of course, I had a lot of Internet knowledge to draw from. I'm proud to say that I can now transform a large sweater into a small.

Here's the garment in question:


I found it (where else?) at Goodwill, and was immediately drawn to the unique neckline. It's a cross between a scoop and a V neck and it's great. 

To take it in, I first flipped it inside-out. Then, I took a shirt that fits me really well and laid it on top.


I marked the sleeves with a pen, because I knew I needed to move the sleeves in. As it originally fit, the shoulder seam was way too wide. 


Next, I marked the sides of the T.


I cut the sleeves off at the seam and pinned their new location. I put the pins really far in so that I'd have plenty of room to sew the seam. I did the same with the sides, so that the fabric wouldn't shift around under the sewing machine's foot.


Then, I simply sewed-up all the seams and cut-out the extra fabric. Easy-peasy.


In all, this project took me about an hour, but that was mostly because I'd never done it before. I feel like I could do this project again in half the time.

Now I just have to wait 6 months for fall to wear my new sweater. Wahoo!


Monday, May 13, 2013

Make-it-Monday: Dealing with Failure

I saw The Great Gatsby over the weekend, though not quite as originally planned. My dress wasn't finished yet, and Roomie had a conflicting event, but that's no matter. We're going on Friday, and this time I'll be dressed for Jazz Age success.

At least that's what I'm telling myself, even though this refashion has been a nightmare.

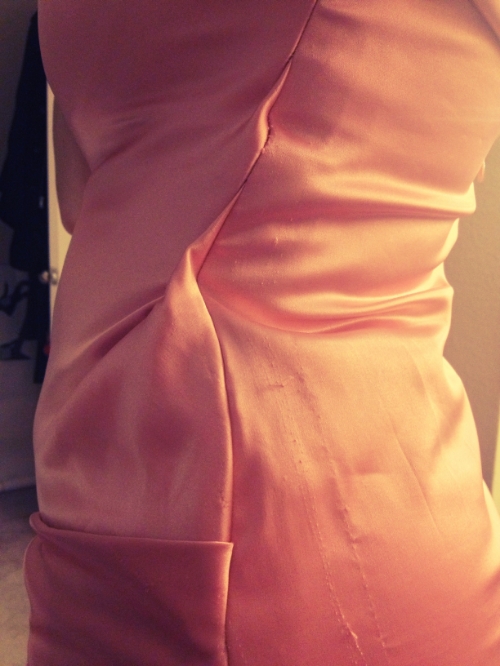
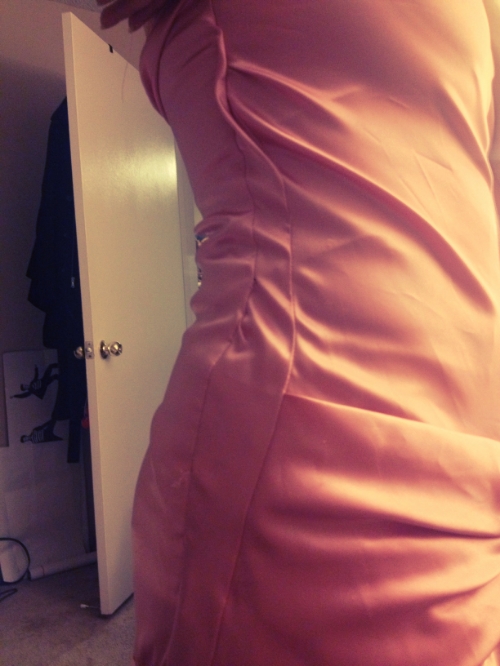
So far, I've taken the sides in five times. I've sewn-in a complete seam, then picked it all out again. The first seams were too tight, so I sewed outside the original lines to give myself a little more room. Somehow, magically, I actually made the dress EVEN SMALLER. I literally have no idea how. I'm discovering so many new and creative ways to destroy a sewing project. 

One side got folded all over itself.

Untitled

Meanwhile, the other had two seams.

Untitled

And the zipper is always slouchy.

Untitled

No matter - I have the rest of the week to work on it (she says, knowing full well that she has no free time). 

Last night I had my first rehearsal for Joseph and the Amazing Technicolor Dreamcoat at the Atlanta Lyric Theatre, and at noon I have my first rehearsal for my summer shows at Stone Mountain. Once again, it's going to be an action-packed summer. I love being busy like this - though physically exhausting, my soul is never more energized than when I'm racing between jobs. 

Oh yeah, about the movie: I highly recommend it. But don't even bother if you're going to watch it like a film snob. It's over-the-top in the most spectacular ways - the anachronistic music, the surreal color palate, the impossible scenery. Baz Luhrmann is like a modern Busby Berkley; there's nothing realistic about the way he films. But that's the whole point. His movies aren't literal; he's not trying to give you Lincoln. It's all about getting the audience in the mood. As a director, he's much more concerned with setting a tone than with any kind of accuracy; as an audience member, I appreciate that. I want to get carried away by movies, and modern bass lines give me a more emotional connection than 20s era jazz would. All that being said, the second half of the movie settles very nicely and much of the pomp falls away (at least for a while). There are some lovely performances, too (like Tobey Maguire making his triumphant return!).

Hopefully, the second time I see it I'll be dressed in a Jazz Age frock of my own redesign. If not, I'll figure something else out. I'm nothing if not resourceful. 

Monday, May 6, 2013

Make-it-Monday: Making a Flapper Dress

I've been looking for a dress to wear to the Great Gatsby movie since January. The search is not going well. The movie opens on Friday, and I've got zip. Nada.

I did try this on recently at Plato's Closet:


And while I like the Art Deco vibe, it still doesn't fit the bill. I thought about lopping the sleeves off and making it a sheath, but then I saw the price tag, and decided my craft projects need to start with something that costs less than $20 (Also, side note, REALLY, Plato? $20 for this thing? Why?).

Luckily, I am addicted to thrift shopping, and I found some less expensive options, like this:


I've got two other options, so if I royally destroy the first two, I'll hopefully have learned enough to make the third one work. The rest of this entry shall be liveblogged as I spend the afternoon refashioning dresses.